If you want your lawn to look like a golf course, then you need to maintain it like one. And that means, among other things, leveling with sand. Sand leveling may sound like a radical practice but it’s actually one of the oldest turf practices in existence. And as I’ve discovered, leveling is just one of the many benefits to topdressing with sand, such as improved drainage and firmness as well as thatch reduction. This article will explain these advantages, as well as the drawbacks, and the detailed steps and considerations for taking on this project.
Advantages of Topdressing your Lawn with Sand
The number one benefit to topdressing with sand is that it’s the easiest and most effective way to level your lawn. Having used topsoil as well as various topdressing mixes over the years I can attest that sand is by far the easiest to spread (whether wet or dry). Additionally, once applied, it has excellent structure so it is not prone to settling or compaction like topdressing mixes with organic matter are.
Over time, sand applications can also firm-up wet areas for improved maintenance and usability. The advantage is most apparent in the spring and periods of heavy rain. During wet periods, sand-topdressed lawns can be used again quickly, whereas natural soil lawns (those containing silt and clay) cannot. As a sand layer becomes wet, it is much better at retaining its strength, allowing for a lawn to be used without getting damaged.

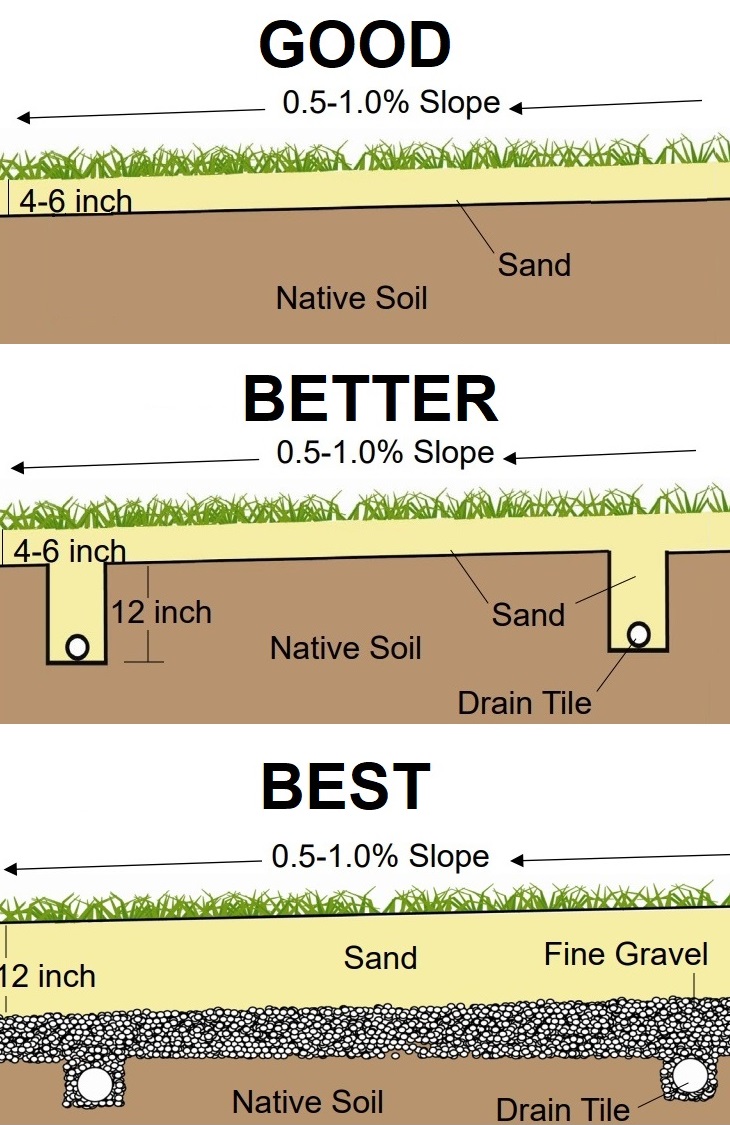
Native soils are almost always incapable of sustaining a high degree of activity without becoming compacted, and when they are saturated or nearly saturated, this occurs more quickly. When soils are compacted drainage becomes poor and turf quality can decline rapidly. Other important benefits to topdressing with sand include diluting thatch and organic matter, a reduction in earthworm castings, improved rooting, and earlier spring green-up. Given these advantages, sand is often used in the design and construction of golf courses and increasingly athletic fields. Although beyond the budgetary and technical resources for most homeowners, this is the best case scenario. By designing a sand-system from the ground up you can maximize it’s performance. This usually includes drainage tile and stone to a depth of 12-18 inches. An alternative, and more cost-effective, approach is to utilize topdressing sand as a protective layer, or cap, on top of the native soil. This is the approach I’m taking and likely the most practical for most homeowners.
Disadvantages of Topdressing your Lawn with Sand
The primary disadvantages to topdressing with sand are cost, labour, and equipment. The amount of sand going down per application is significant. Golf courses, for example, may aim to eventually have a sand layer of between four to six inches thick. This can add up.
Regarding equipment, larger properties may necessitate the use of specialized top-dressing applicators and utility vehicles. This is an equipment vs labour tradeoff as sand is heavy. One cubic foot of dry sand weighs about 100 pounds (if its wet closer to 130 pounds).
Renting a topdressing applicator is an option for homeowners (with large or small properties). Another equipment consideration is wear and tear on mowers. Sand can dull mower blades and bedknives (in the case of reel mowers). I haven’t found this to be a major issue since I have the luxury of being able to let my grass grow a bit longer while the sand works itself in.
The last disadvantage is possible increased irrigation requirements given the reduced water-holding potential of sand. For this reason, irrigation systems are highly recommended. I haven’t noticed this being an issue yet – but next summer will be a better test.
Steps to Leveling your Lawn with Sand
Although sand leveling involves some physical labour, the process is really just a few simple steps.
Step 1: Cut your lawn short
To start off with, it is recommended to cut your lawn as short as possible. This makes it easier to incorporate the sand later.
Step 2: Aerate and dethatch
As with most lawn renovations it is best practice to start off by aerating and dethatching. Core aeration removes plugs of soil from the ground and leaves channels for air, water, and our top-dressing mixture to penetrate the surface. If your lawn is cut short, or you have previously topdressed with sand I recommend picking up the cores. The use of a roller after aeration helps to eliminate any heaving that occurred. Dethatching helps remove any excess thatch and helps with overseeding by opening up the lawn. This is not always needed in my experience.

Step 3: Apply Top-Dressing
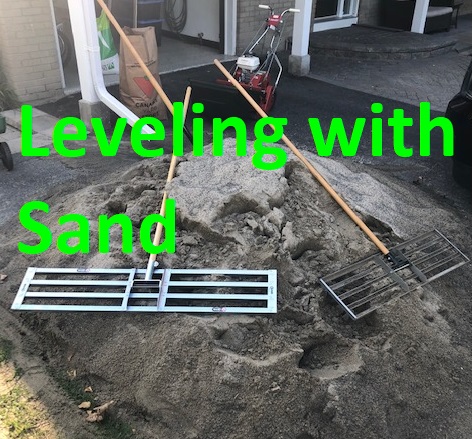
Now you’re ready to get started. Working in small sections, start distributing the sand in small piles with a shovel and wheelbarrow (or cart). Roughly spread the sand using something flat, like the back side of a landscape or leveling rake, working it into the aeration holes and covering low spots. As much as possible, rake the top-dressing into your lawn until you can see your grass through it. A push broom can help with this and a levelawn is especially helpful.


Make sure the sand is no more than 1” deep (preferably ½” or less) over the existing grass. In an ideal world, the application of dry sand on a clean, dry turf surface helps the material to fill the holes as completely as possible. Dry sand moves into holes more readily, while moist sand tends to clump at the top of the holes. When this happens it takes more effort to completely fill holes with sand.
Rain or heavy dew can disrupt the process and may require extra brushing, raking, and irrigation to incorporate the sand. Letting the sand sit in the sun for a few hours often provides enough drying for it to be easier to incorporate. Keep working the sand in until your grass peeks through and the depth is even. I like to drag the grass in alternating directions to get the sand fully incorporated.
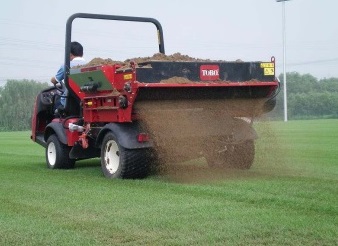
Some golf courses use broadcast spreaders to apply sand. This sand is usually kiln dried however. Do not use wet, damp, or moist sand in a broadcast spreader unless you like self-punishment!
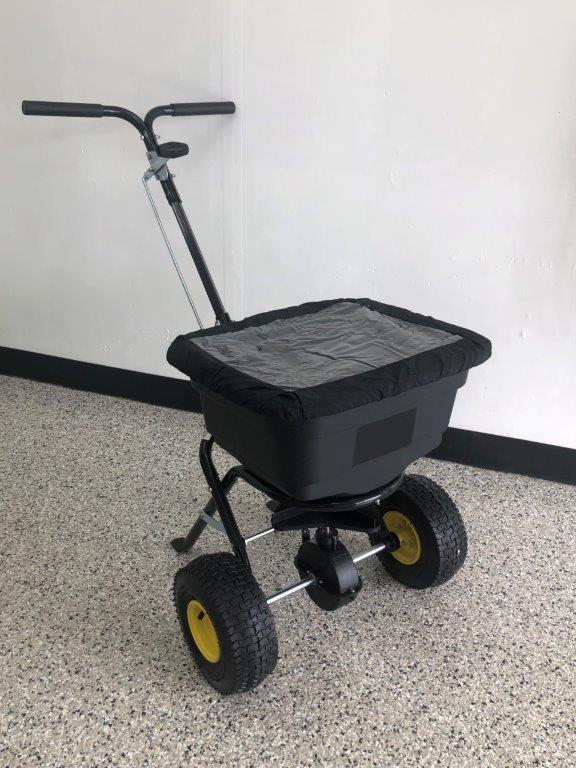

For light topdressing I use my 50lb capacity broadcast spreader. I find letting the sand bake in the sun for a few hours on a tarp dries it out very effectively. Drop-style topdressers are commonly used on large areas and can deliver with high precision. This operator is applying 1 cubic foot of sand per 1,000 sq ft.
For low spots requiring more than an inch of top-dressing, first remove the existing sod to prevent underground decay that can damage new grass seedlings. After filling in the low spot, either replace the old sod or reseed the area. You can also address deeper spots by lowly building them up over time. See my article on Lawn leveling for more info.
Fill the aeration holes completely to the surface. Partially filled aeration holes result in a bumpy surface and reduces the overall effectiveness of core aeration. The holes are going to fill up with something, and if not sand it will be more organic matter. It is typical for sand to settle within the holes after a couple of days. A second application of sand at a lighter rate, after a few days, is sometimes needed to top off the holes. Also going back with your rake and smoothing out any depressions or bumps that may develop is a good practice.
Step 4: Overseed if Needed
Now you can replant grass in any bare spots if needed. Existing grass should be able to grow through as much as an inch of top-dressing, depending on grass type. Check out my article on overseeding. It is critical to use seed rather than sod, because sod placed over sand can create a perched water table, which will significantly inhibit soil infiltration. See my article on soil profile. Trouble spots may need repeat applications.
Step 5: Irrigate and fertilize to stimulate turf recovery
To help further incorporate the stand and stimulate recovery it is important to irrigate your lawn thoroughly and fertilize after leveling. Sand leveling and aeration can induce significant drought stress on the lawn, especially in the late afternoon. Frequent irrigation and supplemental hand watering throughout the day for several days are typically necessary to stimulate and accelerate turf recovery. Since sand is inert a starter fertilizer is especially recommended when overseeding. See my article on fertilization. A follow-up application of a fertilizer five to seven days after renovation at a rate of 0.25 pounds of nitrogen per 1,000 sq ft further helps speed turf recovery
Recommended Tools
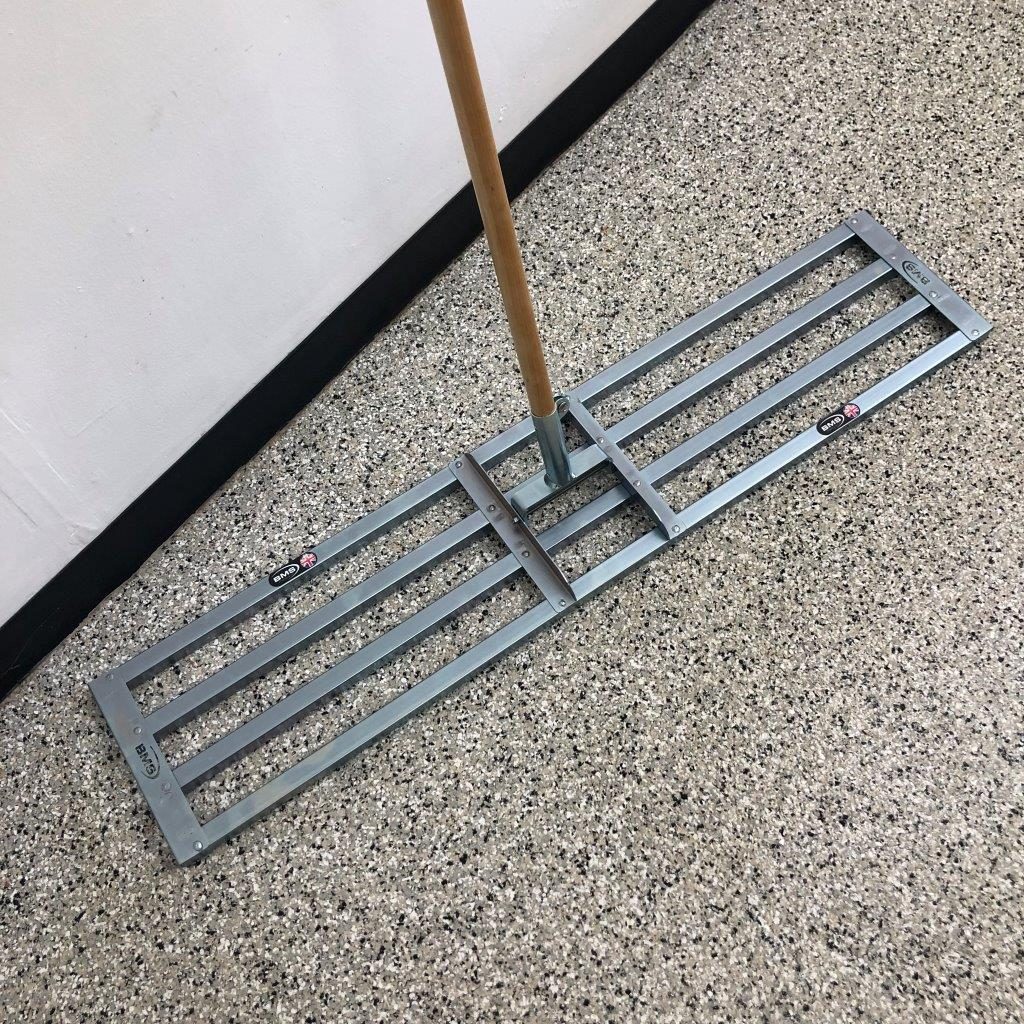
Used by golf course greens-keepers, levelawn leveling rakes are the ultimate tools for distributing leveling materials. They do a much better job at final leveling than a landscape rake or push broom. I have used the 36″ Standard Golf levelawn for a few years now on multiple leveling projects and it has been an essential part of getting the job done quickly and efficiently. This tool is especially good at breaking up small clumps and removing stones and debris.

Making the jump to sand leveling this year I decided to try a larger leveling rake. Although significantly heavier than the Standard Golf, I found this rake to be far superior for sand leveling purposes. The increased weight was beneficial to provide some compression to the loose sand and the increased width resulted in a better leveling outcome. Additionally, the box section construction was more suited to sand because there is no need for stone and debris removal, thus avoiding the pitfall of the rake filling up with sand.
What kind of sand do you use to level a lawn?
The type of sand used is important. Sand that moves or shifts under a load won’t be able to support foot traffic or lawn mowing. Also, using straight sand (as opposed to a sand-soil mix) will give you the best leveling results. Organic matter within the mixture should be avoided, since one of the reasons for sand topdressing is managing organic matter accumulation (also known as thatch). It doesn’t make much sense to use something composed of organic matter to remove an excess of organic matter.
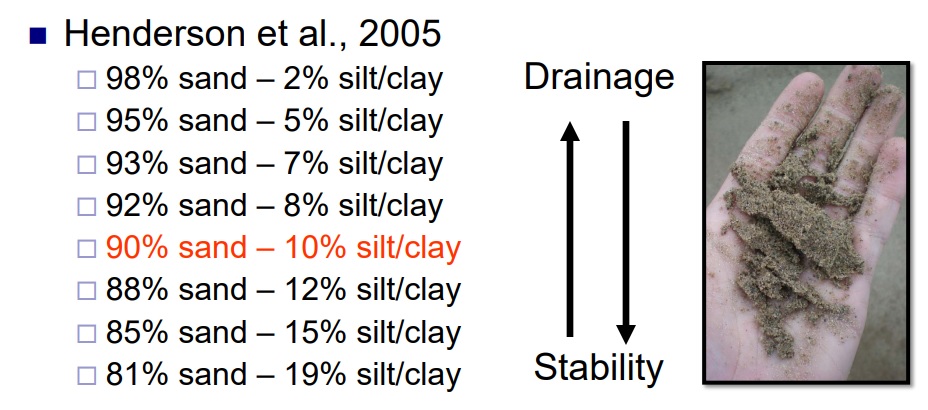
Regarding sand composition, the USGA recommends using a mixture that is at least 60% medium and coarse granules. This mixture will ensure a good balance of drainage versus moisture control (to avoid dehydrating the soil). If the sand particles are too coarse (such as gravel), there is a risk of drying out the soil. Similarly, very fine particles like those found in clay and silt should also be minimized to reduce the risk of clogging the space needed for proper root-zone growth.
USGA spec sand if available in many places around North America and Europe. If it’s not available in your area, or not practical for your application, washed mason or brick sand is often closely comparable. It is important to pick a sand supplier that uses an accredited soil testing laboratory. This way you will get a particle size breakdown of the sand. This is quite commonly available.
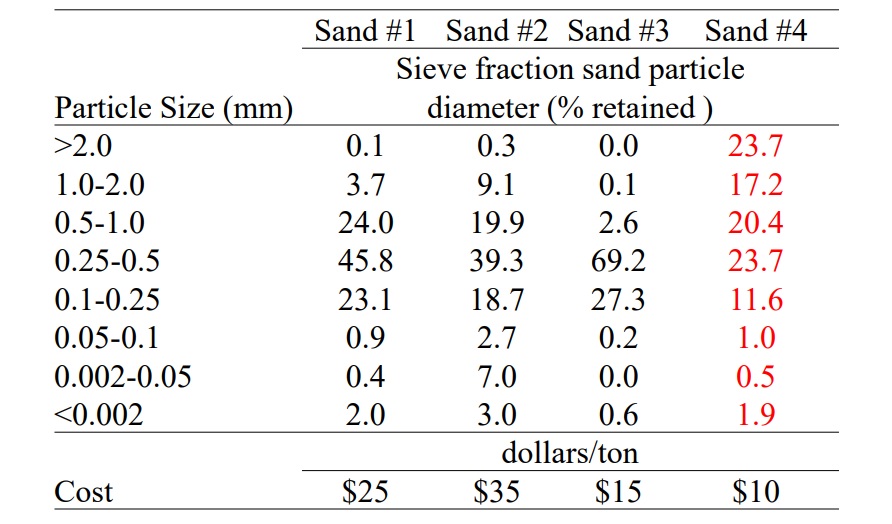
Try to avoid a sand that has a lot of fine and very-fine sand in the mix. The fine sand fraction (0.15-0.25 mm) should not exceed 25 percent, and the very fine fraction (0.05 – 0.15 mm) should not exceed 5 percent, with a maximum 10% silt/clay. Sand with greater than 25 percent fine material could potentially lead to increased moisture at the surface.
The material should also have no particles greater than 2.0 mm in diameter given the difficulty in getting these larger particles to work down into the turf canopy. If the native soil is already mostly sand, it is recommended to use sand that is coarser than the existing material to improve porosity and water infiltration.
Angular sands are also generally preferred (over round) as they are more stable. The cost of quality of topdressing sand can vary considerably. Some can cost $100 or more per ton. Additional considerations include consistency and long-term availability. It’s best to stick with the same sand if possible.
How much sand do I apply and how often?
Research has shown the benefits of light and frequent sand top dressing, however its recommended to do some rough application calculations. There are two important rates to consider: the sand application rate for each topdressing event and the annual rate of all applications. As application frequency increases, the rate needed for each application decreases. The aim is to apply enough sand to keep pace with turf growth so that organic matter accumulation doesn’t become excessive. The benefits of lighter rates include ease of incorporation, and reduced mower wear.
A longstanding topdressing strategy for golf courses has been to apply between 2-4 cubic feet of sand per 1,000 sq ft feet every three to four weeks during the active growing season (Rieke, 1999). From the research I did, 1 cu ft of per 1,000 sq ft is a good starting point for periods of regular growth. This is quite manageable for me. My spreader has a capacity of about 50 lbs, so to do my whole lawn takes 7 loads.
In terms of maximum annual rate, the number that came up most often in my research was between 25-30 cubic feet of sand per 1,000 sq ft per year. Keep in mind that you’re adding material, which over time will raise your grade.
![]()
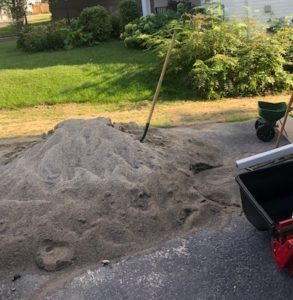
My strategy for this year was dictated by my leveling requirements. I ordered 3 tons of sand for my 3500 sq ft lawn, which is probably around 50 cubic feet considering it was a bit wet. So that is about 14.3 cubic feet/ 1000 sq ft. The main reason I ordered 3 tons is because it was the cheapest way I could get a small load delivered with a dump trailer. Once my leveling job was complete I had about 15 cubic feet of sand remaining. This was enough for me to do two generous topdressing applications. I think this is the perfect amount for my lawn going forward (1 ton/ 1000 sq ft). This allows me to do around half a dozen applications throughout the year with some minor leveling if needed. Although the lawn could handle more, I think this is the sweet spot for me in terms of cost and labour.
When should I level my lawn with sand?
Early autumn is the best time to do a lawn leveling project, especially if you are overseeding, because it is a period of active growth and will give the lawn time to recover before winter hits. You’ll want to give your grass time to grow through at least 3-4 more mowings before severe weather. If Fall is not possible, Spring is the next best option, ensuring soil temperatures are above 50° F (10° C).
Conclusion
Sand topdressing is the easiest and most effective way to level your lawn as well as the most important cultural practice for managing organic matter. Research confirms the benefits of light and frequent sand topdressing that provides excellent drainage and better rootzone characteristics over time. Although labour intensive, once you have the systems in place, the advantages greatly outweigh the disadvantages. Stay tuned for more leveling updates! Also, check out my recommended gear section here for all the tools and products I use.
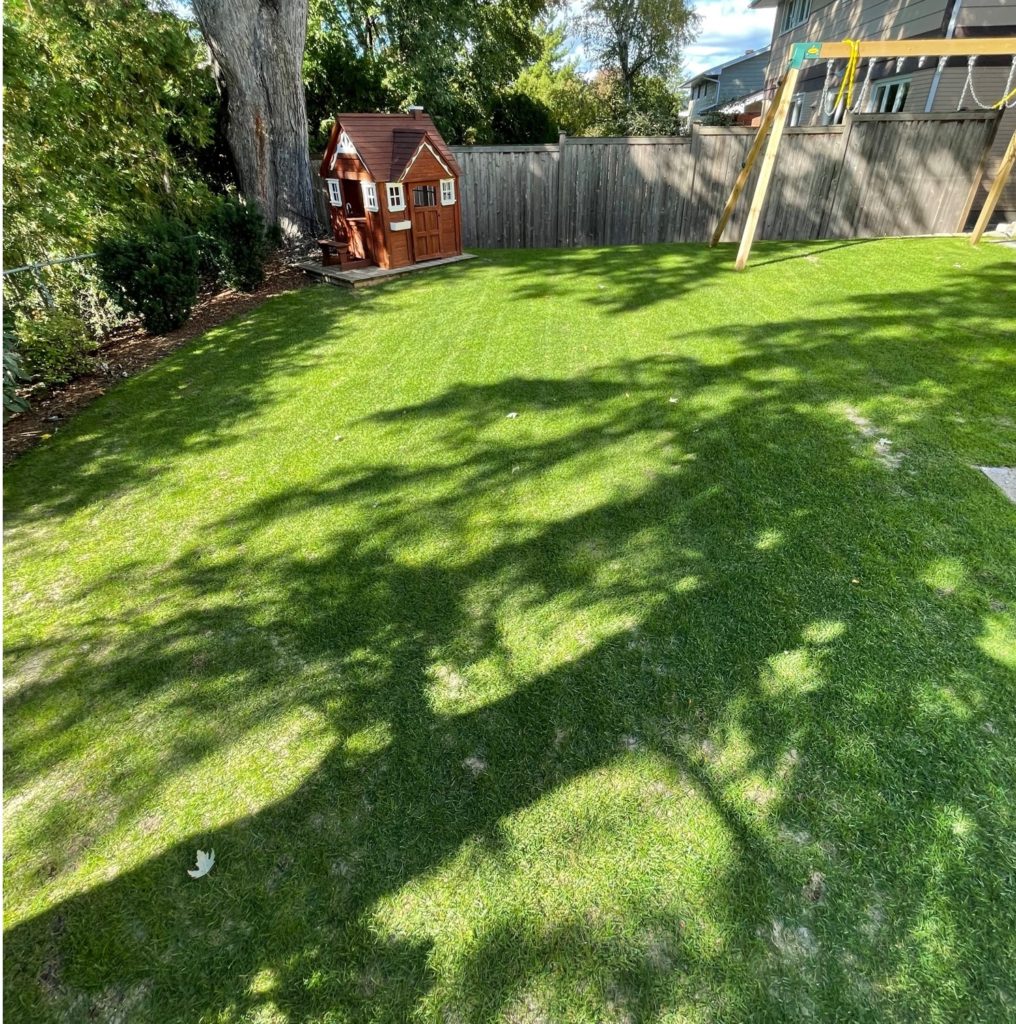
1 week after sand:
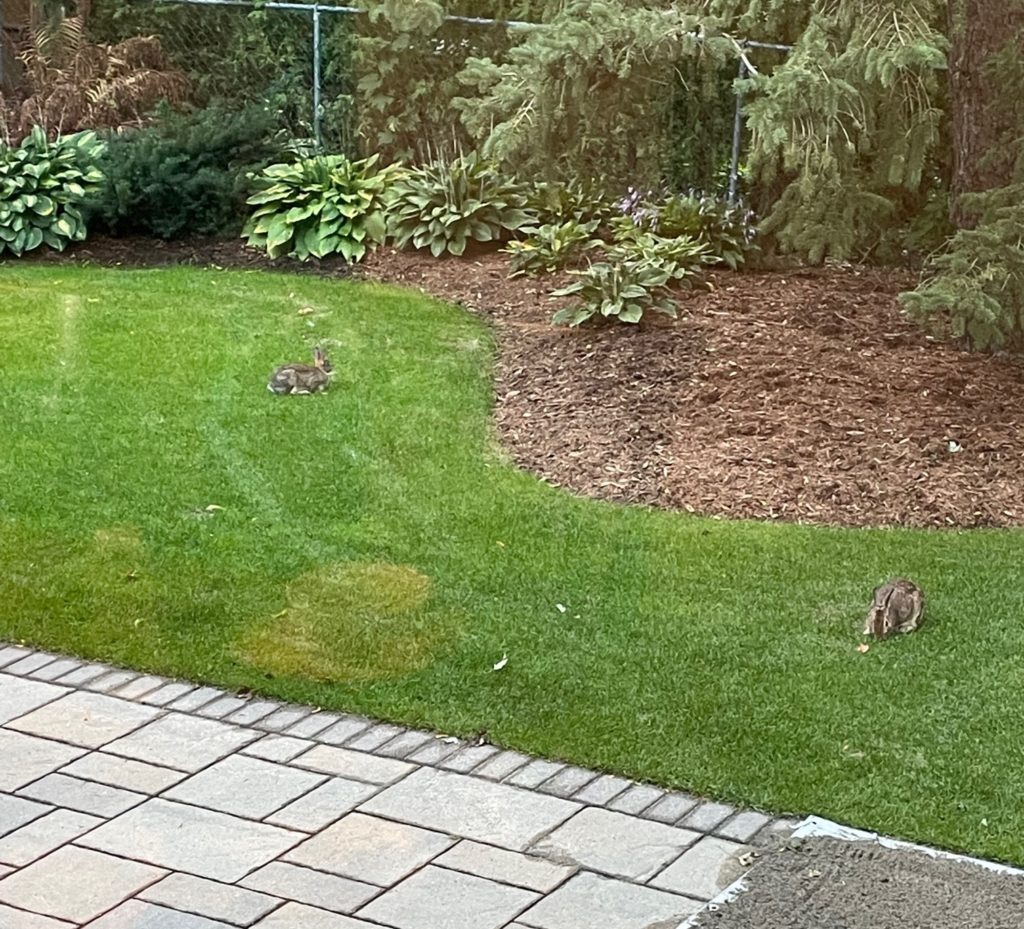
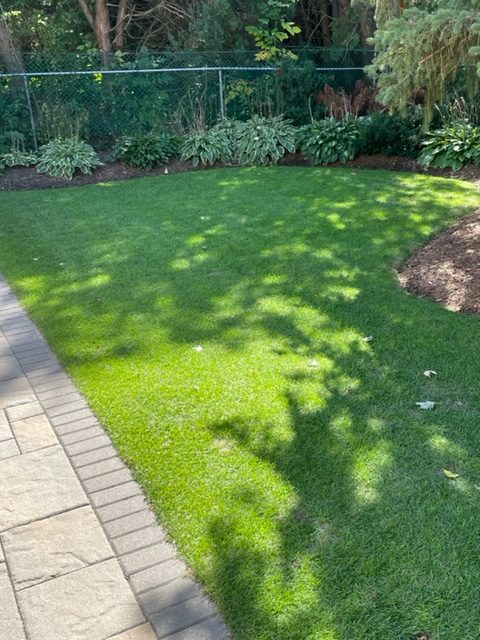
10 days after sand:
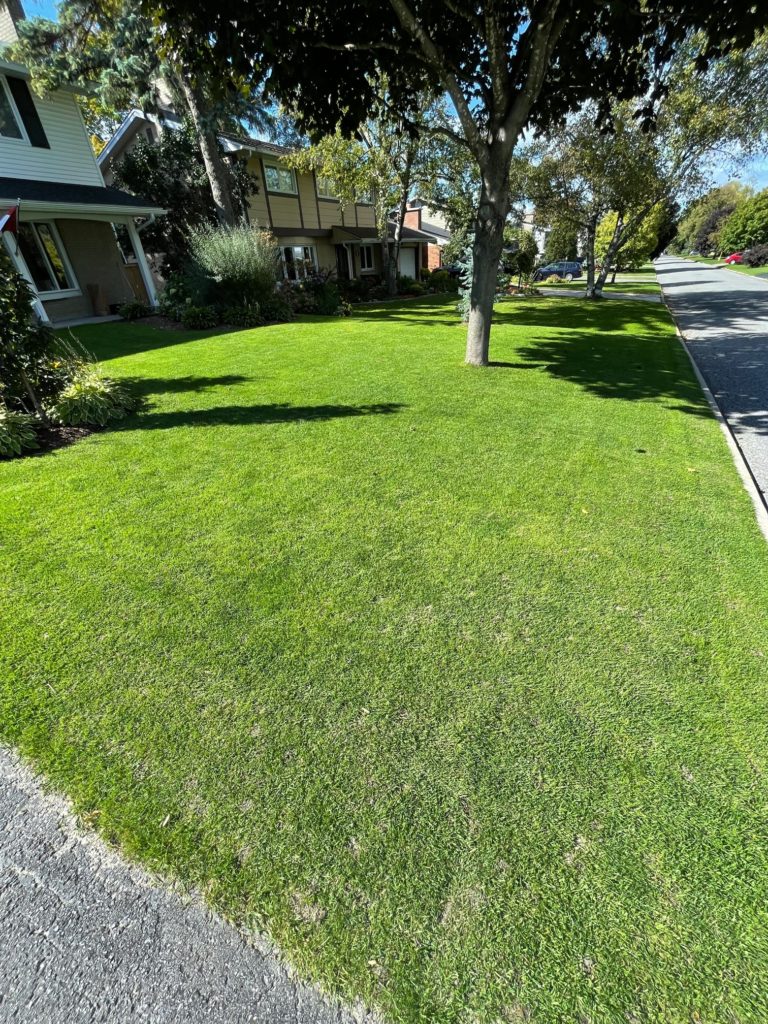
2 weeks after sand: